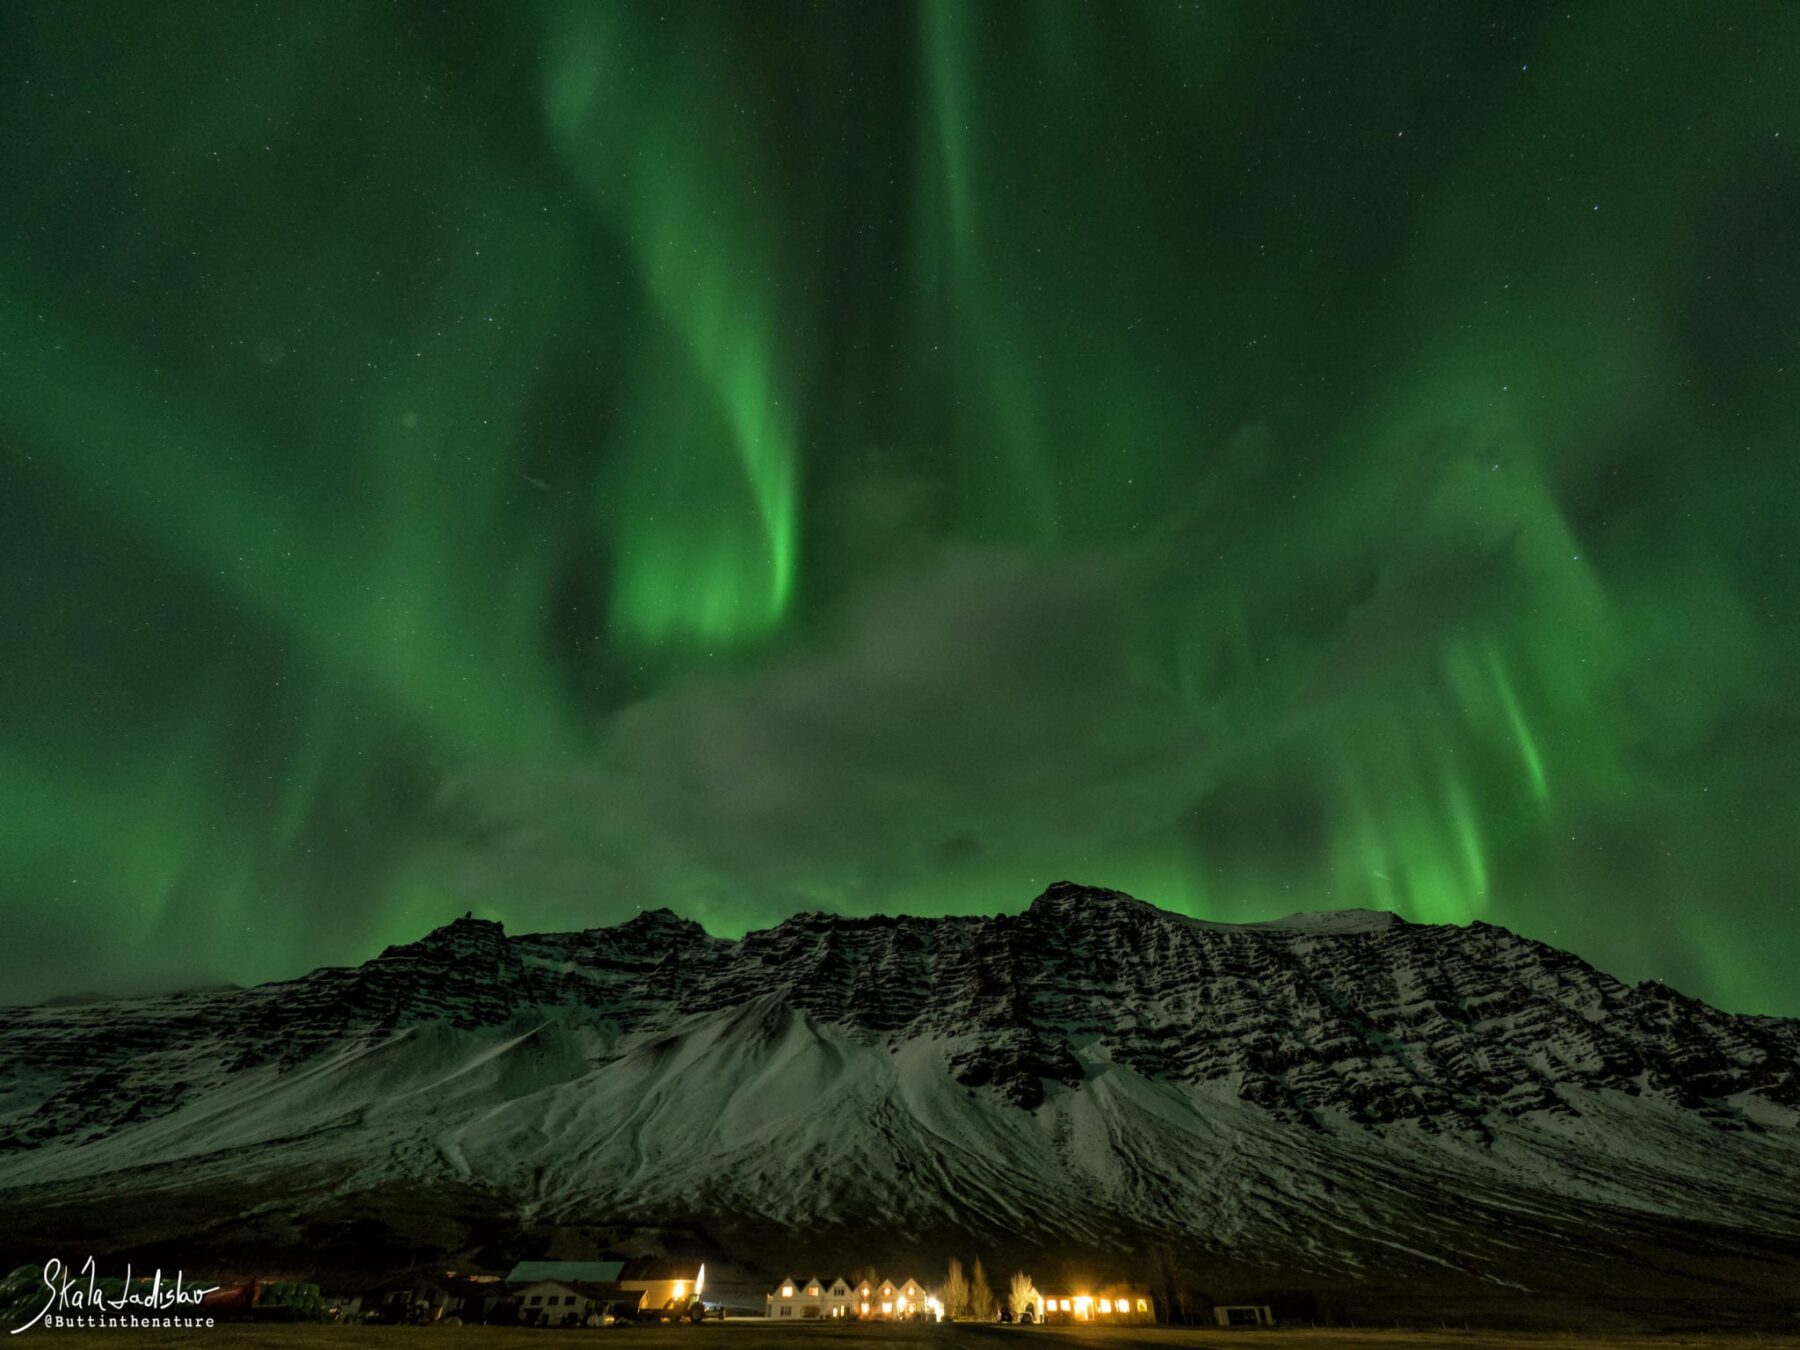

The illusive Northern Lights, one of the most sought after experiences in Iceland, yet many of those daring souls who have braved Iceland’s winter for a glimpse at this hypnotic phenomena have been denied entry into this selective club, that is, those who have seen Aurora Borealis.

Now seeing the Northern Lights is one thing but capturing on this light capturing box we call a camera, is a feat in and of itself because after all, aren’t we all just ‘doing it for the Gram’?
So for those Insta kings and queens, here is the definitive guide to capturing the unicorns of the sky, as we say in Iceland (or maybe just your author).

Let’s start with some basic info:
What are Northern Lights? Well…they are charged particles that are released during solar flares on the sun’s surface and hit our planet at either the north or south pole, they interact with atoms in the earth’s atmosphere.

Colors: The colors most often associated with the aurora borealis are pink, green, yellow, blue, violet, and occasionally orange and white. Typically, when the particles collide with oxygen, yellow and green are produced. Interactions with nitrogen produce red, violet, and occasionally blue colors.

How is the strength of the Northern Lights measured (the KP index)? The Kp number is a system of measuring aurora strength. It goes from 0 to 9 (0 being very weak, 9 being a major geomagnetic storm with strong auroras visible). When you look at the aurora forecast page, you want to see high Kp numbers. The higher the better. Anything above (and including) Kp5 is classed as a geomagnetic storm. The abbreviation Kp comes from the German “Planetarische Kennziffer”, although it is better known in English as the planetary index.

Best time (and season) to see the aurora: As you may have guessed, the most important part of this process, beyond geomagnetic activity, is darkness. Here in Iceland, from about the end of August until the end of March, would provide the conditions necessary to see the Northern Lights. Beyond the time of day and season, make sure to check the aurora forecast and with that, remember that forecasts are just that, forecasts. So, if the sky is clear and the forecast is a 2 or 3, get off the hotel bed, pick up your camera and tripod and get outside!

How to read the Aurora Forecast and which forecast to use:
We prefer the aurora forecast.is page due to its wealth of information and fairly accurate readings. Here is what we are looking for on this page
Cloud cover forecast: On the homepage, you will see the forecasted cloud cover and as you scrub the slider forward in time (isn’t time travel fantastic…), you will be able to get an idea of the forecasted cloud cover for the near future. The more boring the map looks the better. When it get excited and you start to see blue, purple and red that tells us that we will have cloud cover that many prevent us from seeing the Northern Lights.

Kp-index Forecast: As you scrub through the cloud cover forecast, the KP index will also be changing so keep an eye out. Remember, this is like the lottery, the higher the number the better…just don’t waste all your money buying tickets on this fool’s game.

Aurora Northern Hemisphere and Leirvogur Magnetic Observatory: These two screens show some very important information. First, the “Aurora Northern Hemisphere” shows where particles of the aurora are in current time and the Leirvogur Magnetic Observatory (LRV) shows measurements of Earth’s magnetic field. If the measurement is flatlined, it means there is no activity however if it looks like a pulse, get your dancing shoes on and hit the dance floor…or get out in the cold and wait and wait and wait. Nothing happening when the lines are straight. When there are some vibrations on the line then there is an activity of northern light.

The camera settings for those who want to be Insta famous:
- Blow the dust off your tripod and bring it along for the ride, its essential.
- Turn the selection dial to “M” for manual exposure setting.
- Set your ISO somewhere in the range of 1000-1600
- Set your shutter speed to somewhere between 10-15 seconds, any longer and you will see the stars will be moving in your final photo.
- Zoom out as far as possible to capture as much of the Northern Lights as possible. Ideally, in regards to the range of the lens, it’s time to break out the super wide if possible. We shoot with the Olympus Pro 7-14mm.
- Manually focus your camera on some distant star or light from a house. If you are in that location during the day, you can preset your focus.
- Use either a shutter delay or release timer. This will allow you to control your shutter without touching your camera and causing shake. Usually, a 2-second timer works well.
- Lastly, make sure to bring some extra batteries along with extra layers and some Hot Chocolate.

Video by Ladislav Skála
Legends and Folklore about the Northern Lights:
Everyone from the Eskimos to the Mandan tribe in North Dakota has their own unique belief system surrounding the Northern Lights. Check them out here: https://www.hurtigruten.com/must-read-articles/northern-lights/northern-lights-legends-from-around-the-world/